Add Yatmo to a Webflow real estate website
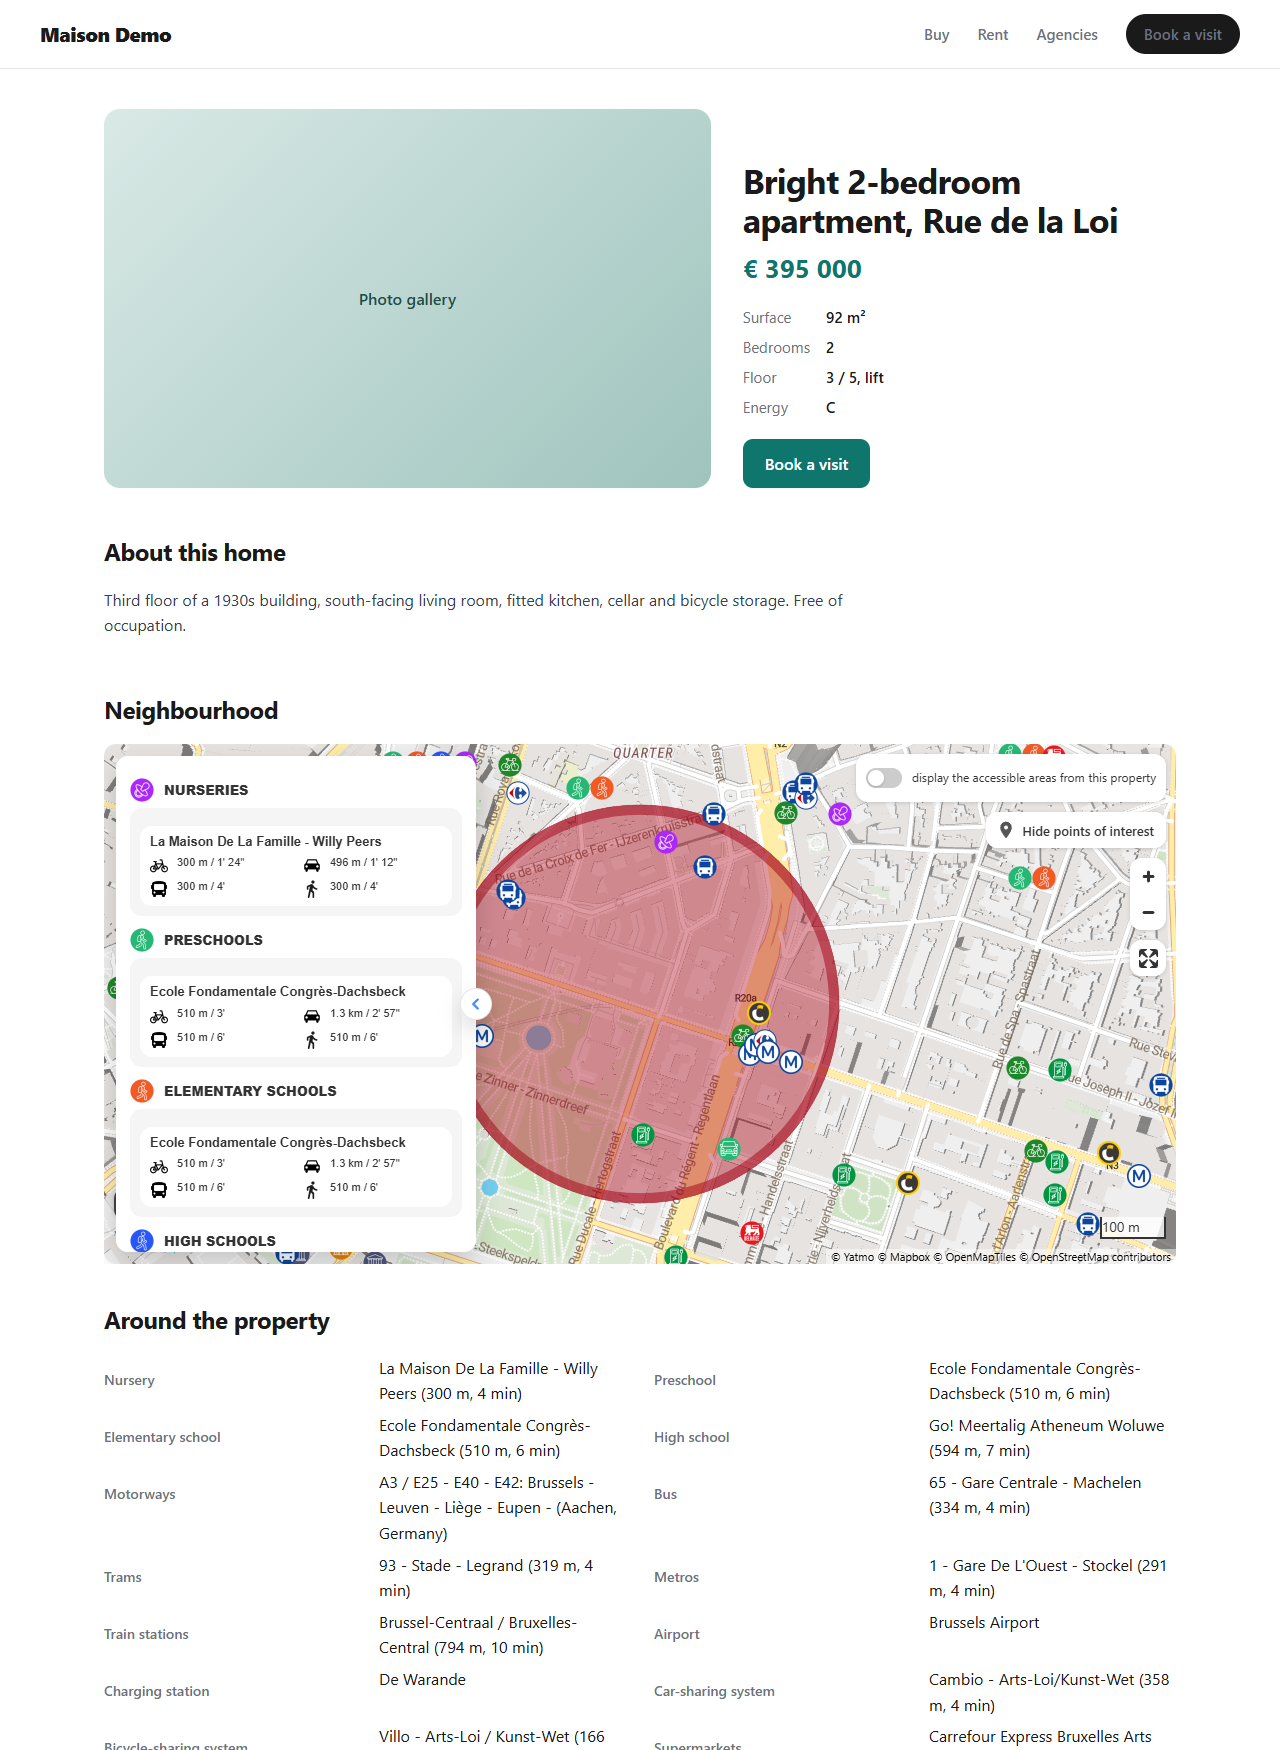
A map of the neighbourhood with points of interest and real travel times, the nearest schools, shops and public transport, and a written description of the area on every property page of a Webflow site, fed by your CMS fields. No backend, no developer: one script in the site settings and three Embed elements. The same embed works on Wix, Squarespace and Framer.
Before you start
- A Yatmo licence: yatmo.com. You will use your frontend key, the one locked to your domains (keys explained). Add
*.webflow.io(the staging domain) and your custom domain to the key’s allowed domains. - A Webflow site with a CMS Collection for the properties (a CMS or Business site plan, since the Embed element on a Collection page needs the CMS).
1. The CMS fields
Open the Properties collection (or create it) and make sure it holds the location of each property, in one of two forms:
- Address: a Plain text field such as
Rue de la Loi 16, 1000 Bruxelles. Yatmo locates it in the country of your site; the simplest option. - Latitude and Longitude: two Number fields with decimal coordinates (
50.8461,4.3664). Use them when you have exact coordinates from your listing software: no lookup, and the pin is exact.
Discreet listings (no exact address shown) work with both: the map shows a circle instead of a pin and the text never names the street.
2. The site-wide code
In Site settings > Custom code > Head code (or the page settings of the Collection page template only), paste the script and the configuration with your key, country and language, then save:
<script type="module" src="https://cdn.jsdelivr.net/npm/@yatmo/elements@1/dist/yatmo-elements.js"></script>
<yatmo-config key="YOUR_FRONTEND_KEY" country="BE" language="FR"></yatmo-config>
The key, the country (BE, FR, NL, LU, CH, DE, IT, ES, PT, IE, UK, AT, CA, GR, MA, AU, HR, MT, SI, RS, CY, BA, ME, BG, AL) and the language (EN, FR, NL, DE...) are now set once for the whole site. Custom code is applied when you publish, not in the Designer.
3. The Embed elements on the property page
Open the Properties Template page (Collection pages, in the Pages panel). Where the map should go, drag an Embed element (Add panel > Advanced) and paste:
<yatmo-map address="ADDRESS_FROM_CMS" marker="circle" isochrone="right" height="520"></yatmo-map>In the embed editor, select ADDRESS_FROM_CMS, click + Add Field and pick the Address field of the collection: Webflow replaces it with the address of each property. With coordinates instead, use latitude="..." longitude="..." and insert the two Number fields the same way.
A second Embed for the nearest places, a third for the neighbourhood text, anywhere on the page:
<yatmo-pois address="ADDRESS_FROM_CMS" categories="education,transport,shopping" mode="walking"></yatmo-pois>

<yatmo-text address="ADDRESS_FROM_CMS" heading="h3" titles="street-city"></yatmo-text>
Each element has more attributes (layout, zoom, style, colour, rounded corners, routes, categories, paragraphs, headings...): use the generator below or the reference. The address is looked up once per page, even with three elements. The Designer shows the raw embed; the elements render on the published site.
marker="circle" circle-radius="300" for discreet listings, marker="pin" for the others. For the text, titles="city" never names the street.4. Publish and style
Publish to the staging domain and open a property page: the map loads, the places and the text appear below it in your page’s font. The elements render plain HTML (h3, p, ul) inside <yatmo-pois> and <yatmo-text>: style them from a custom code Embed with CSS, for example:
yatmo-pois { display: grid; grid-template-columns: repeat(auto-fill, minmax(220px, 1fr)); gap: 8px 24px; }
yatmo-pois h3, yatmo-text h3 { font-size: 1rem; margin: 16px 0 4px; }
yatmo-pois ul { list-style: none; padding: 0; margin: 0; }
If a dashed red box appears in place of an element, it says what is missing (key, domain, address not found): it is visible to everyone, so fix it before publishing to the custom domain.
Embed code generator
Pick the options, copy the code into your Embed elements. With a key, the preview below uses it; without, the demo key.
The first two lines go once in the site’s head code, the elements in Embed elements of the property page. In each element, select ADDRESS_FROM_CMS (or the coordinates) and insert the CMS field with + Add Field.
Search engines
Webflow publishes static pages, and the elements fetch their content in the visitor’s browser: the map is an iframe, the places and the text appear after the page loads. Google renders JavaScript and generally indexes such text, but it is not guaranteed and other engines or AI assistants may not. When indexable text matters, two options: paste the generated text into a Rich text field of the collection (the text plugin or the API give it to you, every language at once), or move to an integration that renders on the server: WordPress, Drupal, Laravel, Next.js.
Wix, Squarespace, Framer, Shopify
The same two snippets work in every builder that accepts custom HTML, with the address or coordinates typed per page when there is no CMS field to insert:
- Squarespace: Settings > Advanced > Code injection > Header for the script and the config, a Code block on the page for the elements.
- Framer: Site settings > General > Custom code > Start of head, then an Embed component (HTML) on the page; CMS fields can be inserted in the embed on a CMS page.
- Wix: Settings > Custom code for the head; on the page, the Embed HTML element runs its content inside an isolated iframe, so paste the script, the config and the elements together in that one block (the map keeps its size if you give the block the same height).
- Shopify: the script and the config in
theme.liquid, the elements in a Custom Liquid section of the product or page template, with Liquid variables for the address (address="{{ product.metafields.custom.address }}").
Runnable page: yatmo-examples/12-webflow.